
Windows
- Microsoft Windows 7/8/10 (32-bit or 64-bit)
- 2 GB RAM minimum, 8 GB RAM recommended
- 2 GB of available disk space minimum, 4 GB Recommended (500 MB for IDE + 1.5 GB for Android SDK and emulator system image)
- 1280 x 800 minimum screen resolution
- JDK 8>above
- For accelerated emulator: 64-bit operating system and Intel processor with support for Intel VT-x, Intel EM64T (Intel 64), and Execute Disable (XD) Bit functionality
Step 1: Install JDK 1.8 or above download click>>JDK download
-after download click .exe file for install
-after successful install right click on My Computer icon
-Now open new tab in left side click advance system setting
-Click Environment variable
-Click new in User Variable>Variable Name is JAVA_HOME
And Value is C:\ProgramFiles\Java\jdk1.8.0_74
-Click OK.
-Below is System variable find path and
Click Edit past code last using ; : C:\Program Files\Java\jdk1.8.0_74\bin; without remove data.if you use window 10 click add and past the code and click OK
-JDK is Installed Successful
Step 2 Download Android Studio
Setting up Android Studio takes just a few clicks.
Download click>> (downloaded Android Studio.)
I launched
android-studio-bundle-143.2821654-windows.exe to start the installation process. The installer responded by presenting the Android Studio Setup dialog box shown in Figure 1.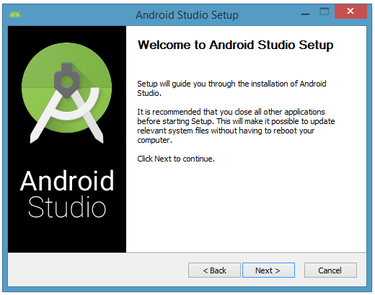
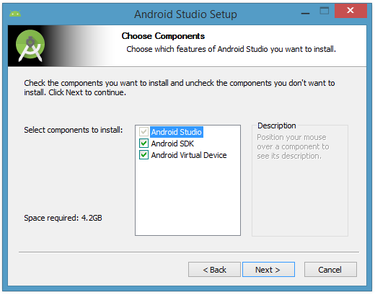
Clicking Next took me to the following dialog box, which gives you the option to decline installing the Android SDK (included with the installer) and an Android Virtual Device (AVD).
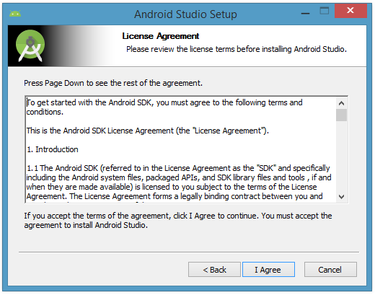
I chose to keep the default settings. After clicking Next, you'll be taken to the license agreement dialog box. Accept the license to continue the installation.
The next dialog box invites you to change the installation locations for Android Studio and the Android SDK.
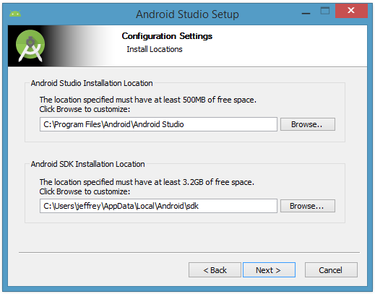
Change the location or accept the default locations and click Next.
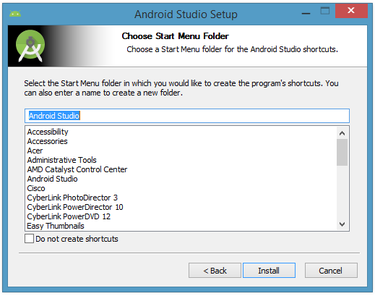
The installer defaults to creating a shortcut for launching this program, or you can choose to decline. I recommend that you create the shortcut, then click the Install button to begin installation.
The resulting dialog box shows the progress of installing Android Studio and the Android SDK. Clicking the Show Details button will let you view detailed information about the installation progress.
The dialog box will inform you when installation has finished. When you click Next, you should see the following:
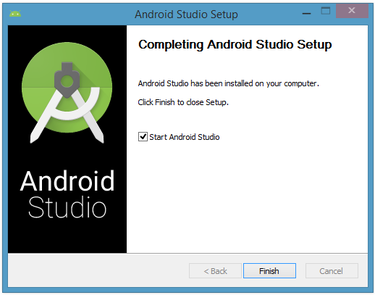
To complete your installation, leave the Start Android Studio box checked and click Finish.
Running Android Studio
Android Studio presents a splash screen when it starts running:

On your first run, you'll be asked to respond to several configuration-oriented dialog boxes. The first dialog box focuses on importing settings from any previously installed version of Android Studio.
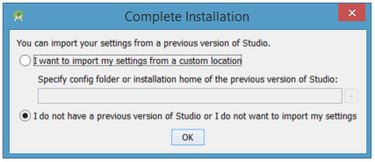
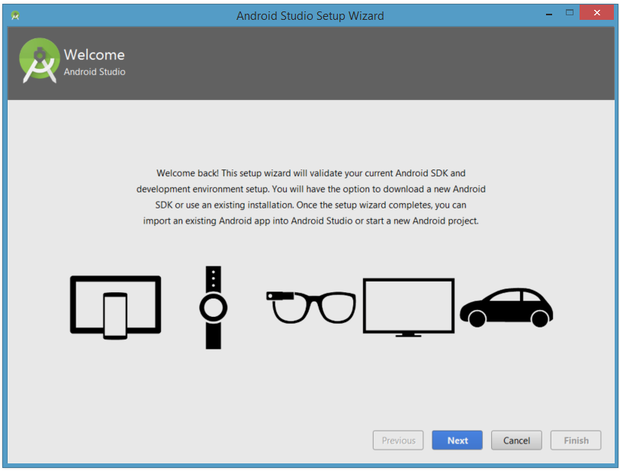
If you're like me, and don't have a previously installed version, you can just keep the default setting and click OK. Android Studio will respond with a slightly enhanced version of the splash screen, followed by the Android Studio Setup Wizard dialog box:
When you click Next, the setup wizard invites you to select an installation type for your SDK components. For now I recommend you keep the default standard setting.

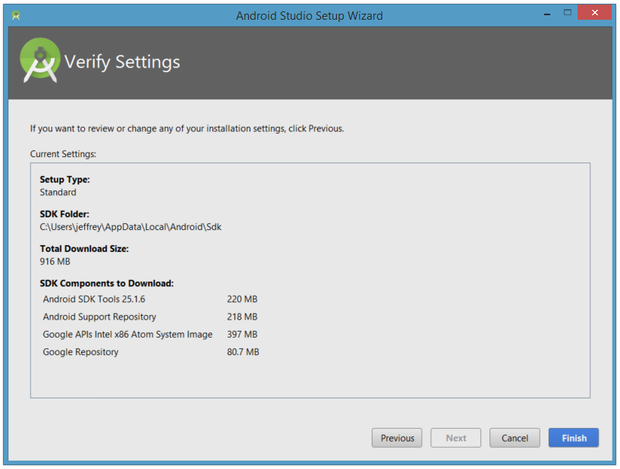
Click Next and verify your settings, then click Finish to continue.
The wizard will download and unzip various components. Click Show Details if you want to see more information about the archives being downloaded and their contents.

If your computer isn't Intel based, you might get an unpleasant surprise after the components have completely downloaded and unzipped:

Your options are to either put up with the slow emulator or use an Android device to speed up development. I'll discuss the latter option later in the tutorial.
Finally, click Finish to complete the wizard. You should see the Welcome to Android Studio dialog box:
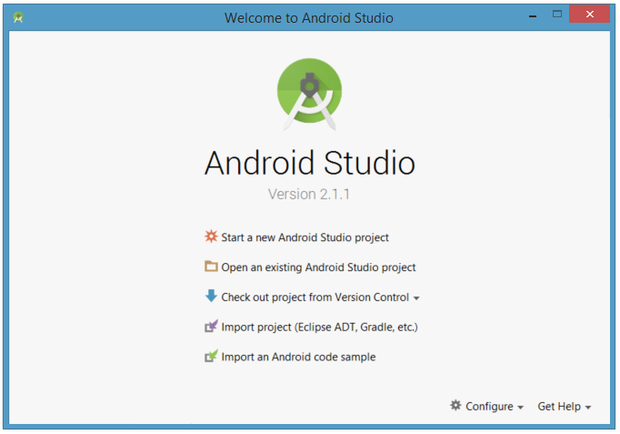
You'll use this dialog to start up a new Android Studio project, work with an existing project, and more. You can access it anytime by double-clicking the Android Studio shortcut on your desktop.
No comments:
Post a Comment